
As a housewarming (and birthday) gift for a dear friend, I decided to celebrate her new home by embroidering it. Read below to learn how I did this personalized embroidery using my new Janome Skyline S9 and the free AcuSketch iPad app. This was fun, first project to learn my way around the machine.

I like drawing out my projects with pencil and paper to start, so I first sketched house while looking at a photo of it from straight on and cleaned up the lines with a ruler. You can skip this step if you'd like, since you'll be redrawing the house digitally.
 |
| Tracing over my pencil drawing |
Next, open the free AcuSketch on your iPad, start a new file, choose the largest hoop setting, and use the photo/camera feature to take a photo of your drawing (or photo of the house). Start drawing!
 |
| Drawing View |
 |
| Stitch View |
Tips:
- I found it helpful to switch to the "stitch" view to see how your lines were translating into embroidery paths. Sometimes, corners would be crooked or rounded, so I could go back to draw view and fix. It's easier to do this as you go, rather than draw the whole house and find many details need fixing.
- The file embroiders in the order you draw, so you can use this to your advantage to create a more efficient embroidery. E.g. minimize jumping across the page to draw details
 |
| Checking for crooked or stray lines |
In the "stitch" view, you can choose your stitch length and other features. I used the single straight stitch and 1.5mm (smallest) stitch length to maximize sharp details like all the corners in my design.
There's also a button to turn on/off Lockstitches (where each stitch starts with a few backstitches to secure the stitch). While the backstitches create the darker, doubled up stitches you can see in the final design, I find they make a more secure final product. For a hanging hoop like this that won't be disturbed or touched, you don't need the lockstitches, but if you're embroidering onto something that will see a lot of use like a kitchen towel, then you'll definitely want the lockstitches.
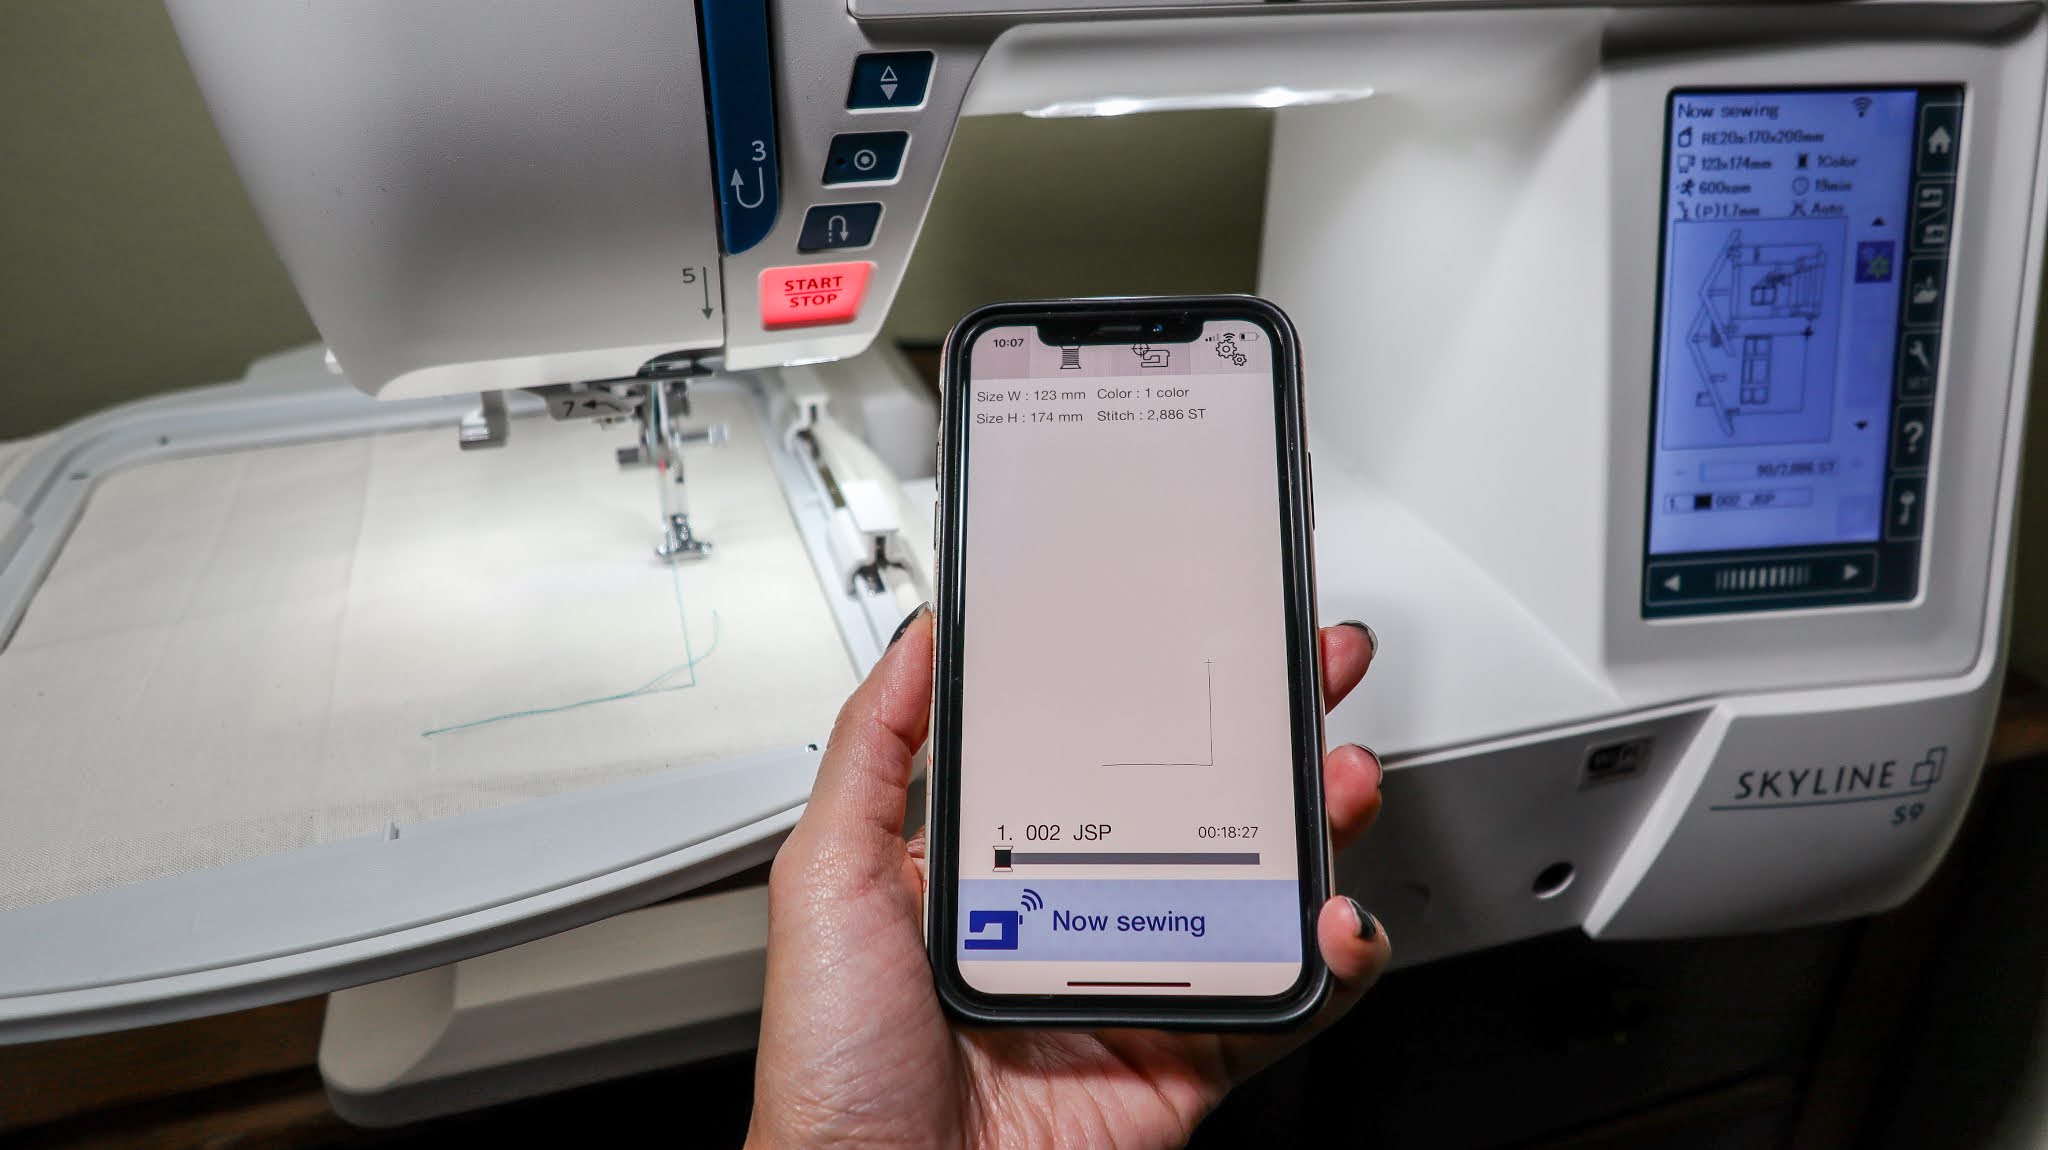
When you're happy with your file, use the wifi feature and send the file to your Janome Skyline S9.
To set up the fabric for embroidery, I used Pellon Stitch-N-Tear Lite stabilizer under my cotton muslin, and clamped both into the hoop.


Press start, and off it goes! I also loved being able to monitor the progress on the AcuMonitor app on my iPhone. At one point between sections, the thread slipped out of the needle and the app alerted me to it.
Embroidering all done and ready to be finished. I took it off the hoop, tore away all the stabilizer, clipped any stray threads, and mounted it on the wood embroidery hoop.

This was my first time trying machine embroidery and I can't wait to dive into more. If you try this project, tag me on Instagram, I'd love to see!